| 1. This is a picture of the
drivers side rear seat that you will be removing.
Slide both of the front
seats as far forward as they will go, you'll need the room and lean the
front seat backs forward as well. |
 |
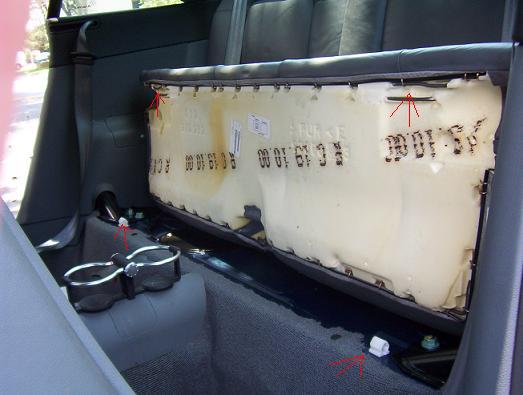
| 2. With your hands under the
bottom of the back seat, pull straight up. It almost seems like you're
going to break or bend something you don't want to, but if you pull straight
up, the front of the seat will pop out of the clasps. In the picture,
the red arrows point to the clasps and where they snap into the fronts of
the seats, so you know where-abouts to place your hands. |
 |
| 3. Now that you have the
bottom of the seat removed, you're going to remove ONLY the drivers side
rear seat back. To do so, you'll need the T-45 torx head (see 3a) and
your 17mm socket (deep well not necessary, but will do).
With the 17mm
socket, remove the 2 bolts that hold in the seat belt mechanisms (see 4).
You will remove these bolts completely, but you only need to loosen
the torx-head screws. |
 |
| 3a. This is the torx-head
screw you loosen. |
 |
| 4. This is the torx-head
screw and
the 17mm bolt for the seat belt mechanism and the seat back. Remove
the 17mm bolt, but only loosen the torx-head screw.
When you remove the
17mm bolt, the seat belt receptacle will come loose, remove it entirely and
keep the bolt with it so you don't lose it.
Loosen the torx-head screw to remove the seat back.
With both of the 17mm bolts removed and both of the torx-head screws
loosened, unlatch the seat back (like you're going to lay it down) and slide it back to release the seat back
from the torx-head screws and pull the seat back free and set aside. |
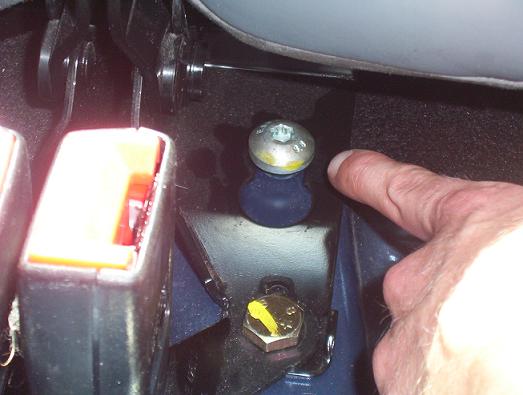 |
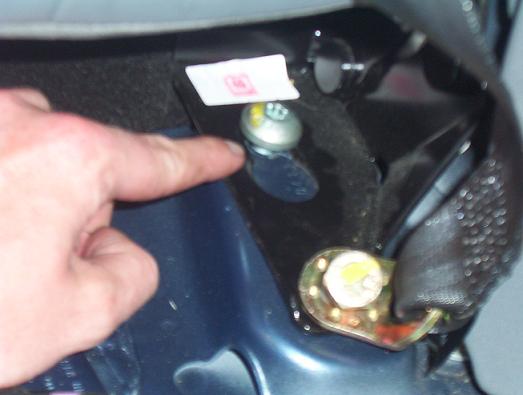
| 5. This is the latching pin
(striking pin) for the seat back. It needs to be removed in order to
pull off the side panel of the interior. To remove it, use your deep
well socket, fit it over the pin onto the bolt and remove the entire fixture
and set aside - keeping everything together. |
 |
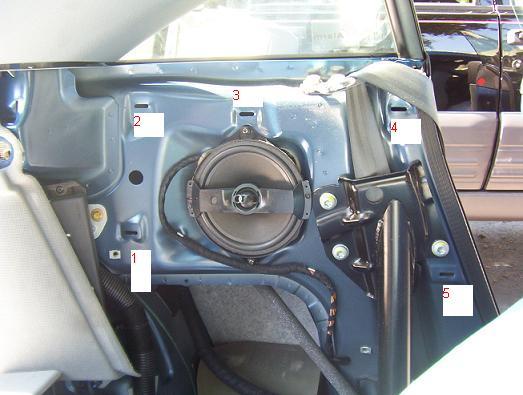
| 6. Now that the latching pin
is removed, you will be able to "pop-off" the side panel. Starting at
the latch pin hole, move down on the panel and slide your hand in while
pulling towards you. The snaps will pop-free and you will hear a
"pop." There are 7 snaps. Refer to the audi tech bulletin for a
picture showing you where all of the snaps are. I only have 5 labeled
here because I'm an idiot. The entire side panel is going to be removed,
this includes the upper portion that holds the seat belt. DO NOT try
to just remove the lower portion as you will un-glue the upper portion from
the bottom portion and you don't want that to happen now do you?
After unsnapping the panel, put it aside and out of the way (the seat
belt will still be running through the panel). |
 |
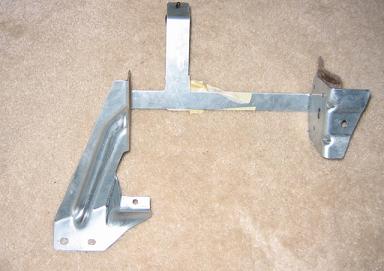
| 7. This is the mounting
bracket (thanks Ben) that you're going to mount the changer to. It's
upside down and flipped in this picture, refer to the next picture for the
proper mounting locations. |
 |
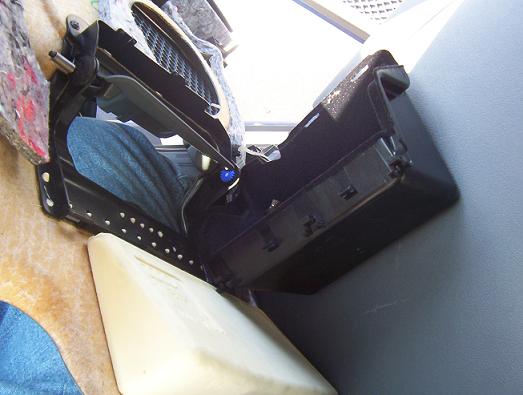
| 8.
This is the changer, installed and bolted into the car. The red arrows
indicate the 4 bolts you use to bolt the bracket to the car. I believe
it's a 10mm socket. My car had a foam-like spacer in the place just
under the changer. Leave that in. If you took it out, just lay it back in
there. *Notice the location of the
stickers.
Assuming your TT is pre-wired for the changer
(like most are I think), you just need to plug the changer into the plug
that is provided. The gray foam looking thing (at the bottom left of
the changer in this pic) is the covering of the car's female (if I remember
right) plug.
Plug it in and you should hear some power
turning on in the changer. Eject the tray and put in a CD. Put your key in
the ignition and give it a turn (no need to start the car) and make sure the
thing works before you put the entire car back together. |
 |
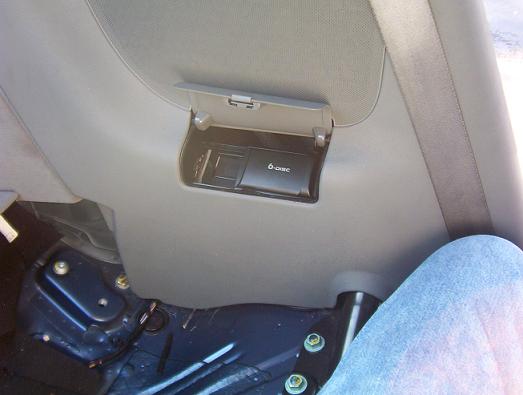
| 9.
Get the side panel now and you'll need to remove the tray that is currently
there where the CD Changer goes. To remove this tray, simply pop it
off of the snaps, two of which are where my fingers are (there are "hinges"
on the bottom too). Be firm, but be gentle. You don't want to break
anything in case you want to revert back to this one day or give it to
someone. |
 |
| 10.
This is the tray from the side panel totally removed. |
 |
| 11.
The installation of the side panel is the reverse of its removal. Take
a look at the snaps and remember where they are.
Now simply align everything and then push
where the snaps are to snap the side panel onto the car. |
 |
| 12.
Now, put the rest of the car together in the reverse order in which you
removed it. |
|